Last month I happened to run across some things at PaperTrey Ink and I fell in love with them....so of course I had to order all of them...well, maybe not ALL of them...but a good portion of them. I also happened to catch a youtube video on my favorite so I decided to do a tutorial to show y'all. It's a bit lengthy and has lots of pictures!
The stamp set is called Happy Hexagons Mini Stamp and there is a matching die cut called Cover Plate: Hexagons. The first thing to do is die cut the cover plate. The cover plate template is about the size of an A2 card (5.5 x 4.25). Then you poke out the little hexagon pieces...there are full, half and quarter pieces.
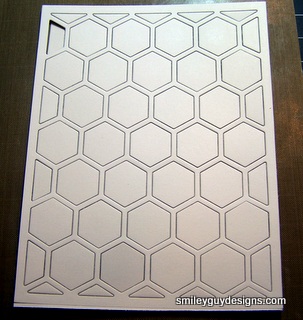
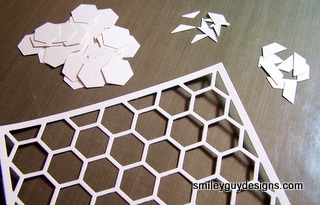
What you're left with is a template. As I poked out the pieces I put them in separate piles so that I didn't have to sort them later. For my project I won't be using the quarter pieces.
Nicole Heady is the designer of the stamp set and cover plate. She has also created this color template which is FABULOUS. She has taken all the headache out of trying to put all the pieces back in the template without having too many of the same pieces side by side. She has the color templates for using 3, 4, 5 or 6 colors. The sheet also shows how many of each color is needed. This is a free download from her website.
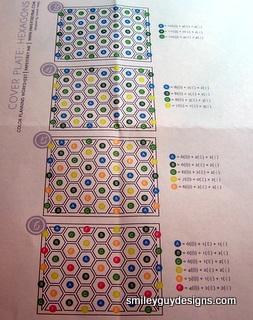
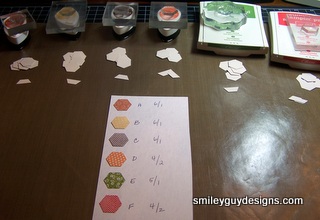
I decided to use 6 colors, so I picked 6 different hexagon stamp patterns and 6 different ink colors. I labeled each color and pattern as A, B, C......F. The numbers by each color represent how many full hexagons and how many half hexagons are needed for each color. (for example A, I need 6 full and 1 half).

I then counted out all the pieces I needed and put them with the stamps and inks. Time to start stamping.

When all the pieces are stamped, it's time to take the template and begin building your pattern. I used scotch tape to keep the template in place. It's easier to put adhesive through the openings of the template than trying to put it on each hexagon piece. Following the chart, put all of the A pieces in the A spots, B pieces in the B spots and so on until the entire piece is complete.


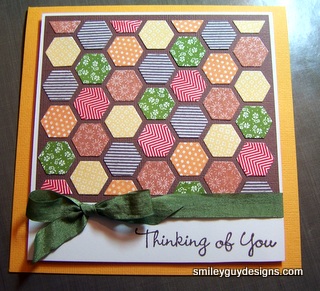
When you're done, you lift the template off and you're left with a beautiful pattern. You don't have to fill in the entire template, you can just do a couple of rows for a border, or maybe create a flower, you can even cut apart some of the inside pieces to make room for a sentiment. When you're done use the piece to make a card.
Check out all the fabulous things PaperTrey Ink has - last month was their Autumn release and they have some really cool looking stamp sets and matching die cuts.
Thanks for visiting - see you next time.
Heidi
OMG, this tutorial is great, Heidi! And, another OMG, I HAVE to check out that site! That template is awesome. And your card is gorgeous! Thanks for sharing :)
ReplyDelete