Being a typical girl, I love Valentine's Day - my boyfriend on the other hand isn't a true fan. He doesn't hate V-Day but thinks it's a whacked up holiday - his philosophy...."shouldn't I show you I love you every day of the year and not just one particular day in February?". Who can argue with that? But.....a girl likes to be wooed on the same day as many other girls are being wooed, so we can compare whose boyfriend or husband loves us the bestest! You've all been there...my flowers are better than your flowers or my candy heart has way more candy than your's does.
The card I'm posting today is one I made last year. It's an easel card which I'm very fond of. I like making easel cards and giving them to special people who will appreciate them and want to display them for all to see...and easel cards make displaying them a breeze.
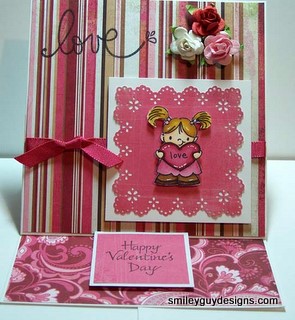

Since this project was made last year I don't have all the specifics of the products that were used. I do know the pink paper that has the border all around was done with a Martha Stewart Punch Around the Page border punch set. I think it was called 'Eyelet Lace'. These punches are very easy to use as long as your paper is the exact size indicated in the instructions. The little girl was colored with Copic markers.
My easel card is 6x6. Very easy to make. Take a 6x12 piece of cardstock and score it at 3" and 6". Fold it as shown above. Take a separate 6x6 piece of cardstock and decorate as desired. When adhering the separate piece to the card base make sure to only put adhesive on the bottom 3x3 piece of the separate piece OR just put the adhesive on the 3x3 folded section of the card base. Don't forget to put something on the inside part of the card to act as a stopper. I've used buttons, brads or just a sentiment adhered with pop dots. Card folds flat for mailing.
That's all for now....thanks for stopping by!
Heidi
No comments:
Post a Comment