December 29, 2011

Say Goodbye to 2011....

Sorry I haven't been around lately.  I've been on vacation from work and enjoying a little downtime.  I've done some cleaning, crafting, shopping and lunching with friends.  It's been a blast!  Well, we won't mention the two trips to the dentist to fix some fillings....not so much fun!  Hope everyone had a wonderful Christmas and received lots of goodies and not much coal, LOL!!!  I was sweatin' it but didn't get any coal myself so I consider this holiday season a success.

The weather in southeast Wisconsin has been pretty good this year although I missed having a white Christmas.  We haven't had any snow (at least in Kenosha) this year other than a light dusting a few weeks ago.  I heard on the radio that at this time last year we'd already had over 8 inches of the white stuff.  I hope the delay in snow this year doesn't mean we'll have snow in June....yikes!

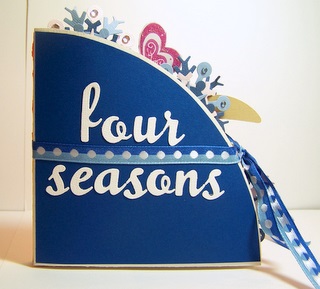
A few weeks ago I entered a contest to be on the design team for Spellbinders Paper Arts.  Unfortunately I didn't make the first round cut but I wanted to share the project I made. I thought it was a pretty cool idea. It's a circle flip card of the four seasons.  I had a fun time figuring out what to put in each section for Winter, Spring, Summer and Fall.  I'm pretty excited that I used paper and supplies I already had at home.  I don't have to tell you guys how exciting it is to use up supplies you have in your stash....I LOVE, LOVE, LOVE buying new stuff but it's nice to use what's already on hand.

Here's the card when it's closed and tied with ribbon.


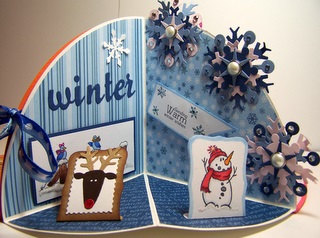
The WINTER scene used die cuts, stamps, Copics and Candi.  Brrrrr, can't you feel the cold????

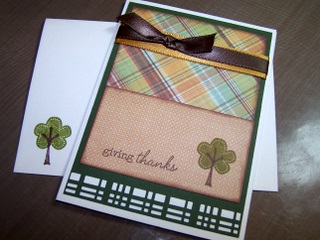
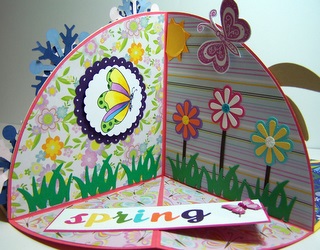
The SPRING scene used dies, punches, brads, stamps and Copics.  I can almost smell the flowers!

The SUMMER scene used my Cricut, stamp, Copics and die cuts. I love watermelon - Yum-O!

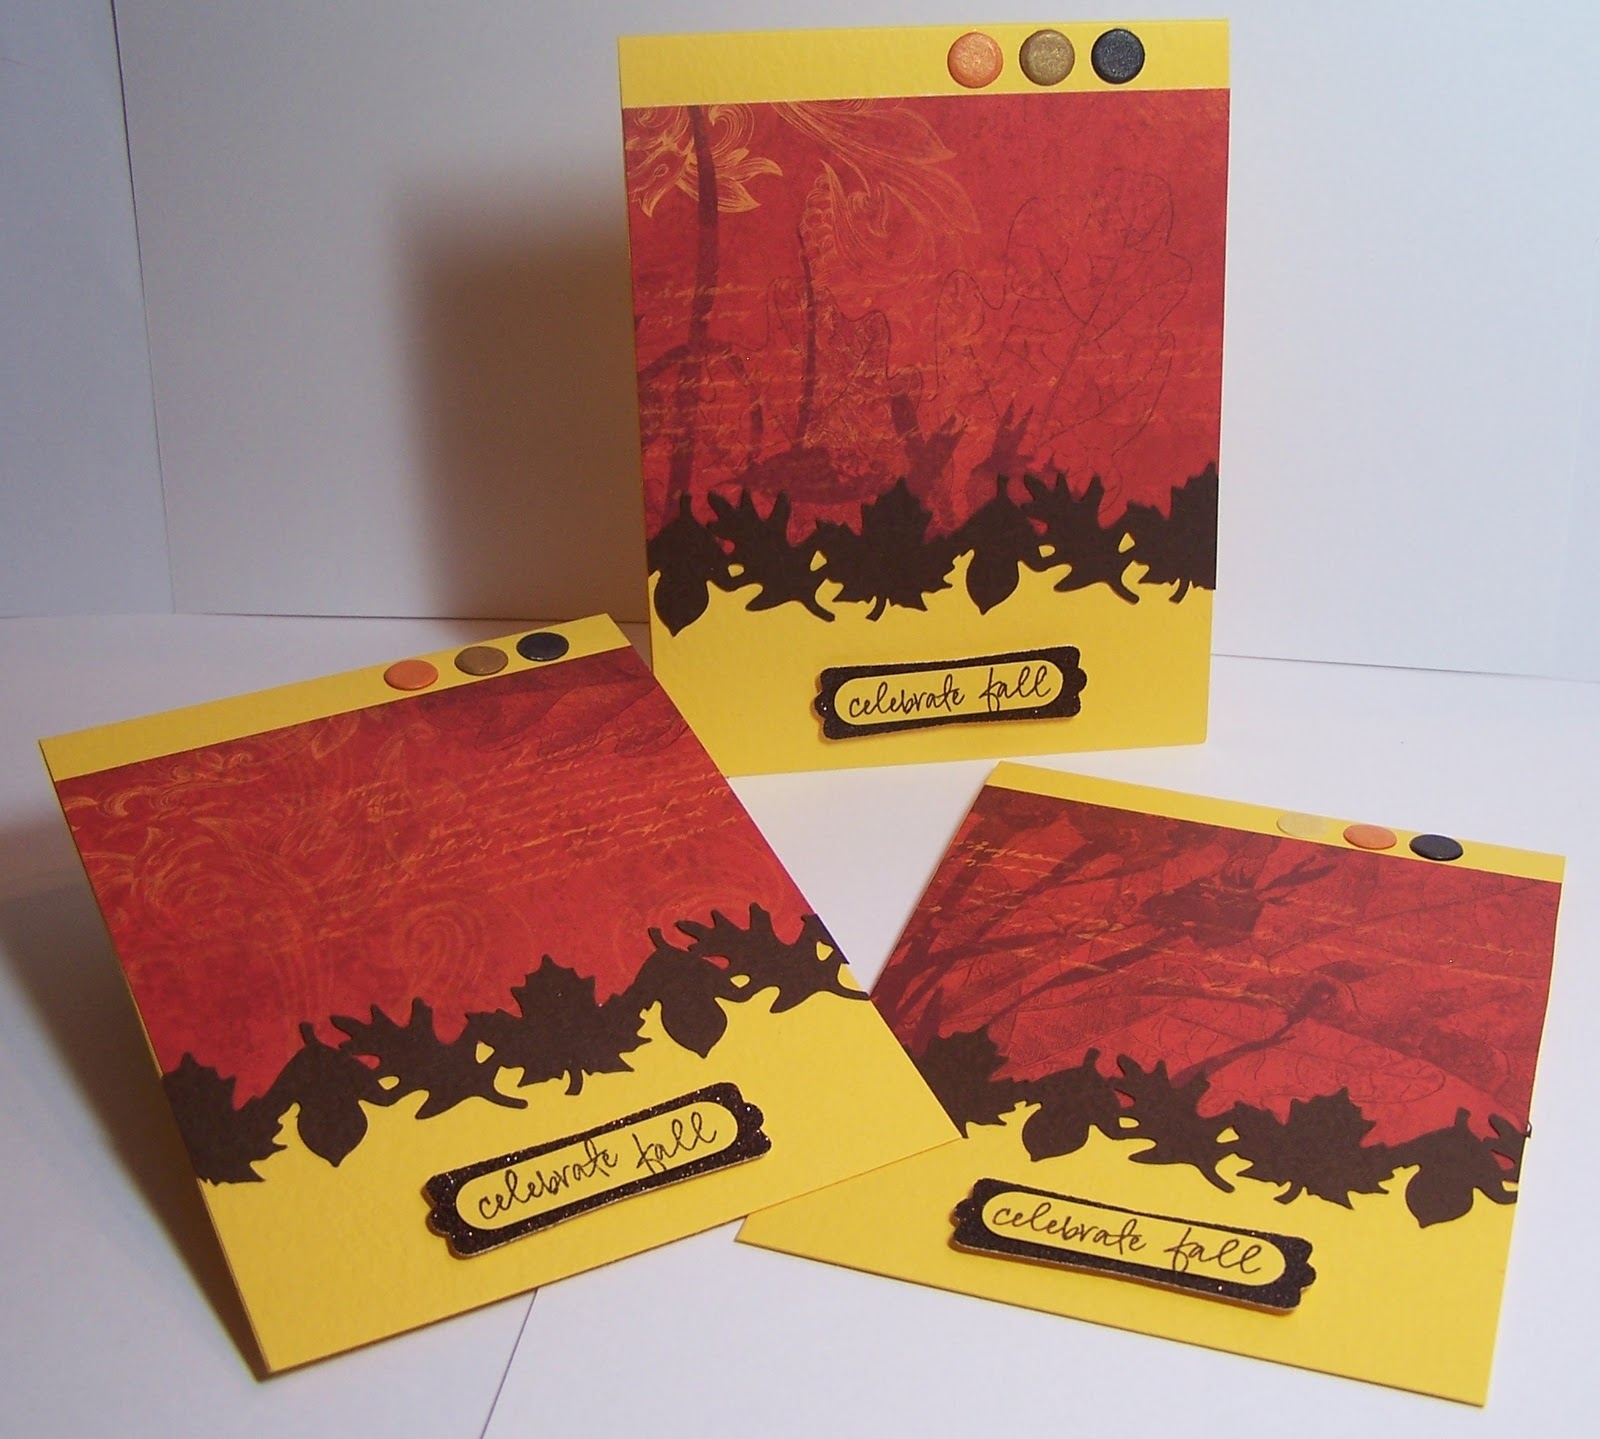
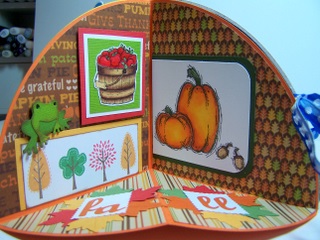
The FALL scene used die cuts, stamps and Copics. Pumpkins and apples and frogs oh my!

That's it for today.  Thanks for stopping by.  I want to wish everyone a Happy New Year, please be safe. 

Heidi

December 16, 2011

Greetings of Christmas Past

Hi everyone...sorry I haven't been around the last few days....I've been busy at work as well as trying to finish all I needed to in order to get my Christmas cards ready and mailed....I've finally finished them and they're ready to mail.  If I don't get them mailed tomorrow I'll have to change them to Happy New Years cards...yikes - is Christmas really only 8 days away!!!!  OMG!

What I want to share with you today are some gift tags and cards from holidays past. 

These gift cards were some of my favs!  I just love the little penguin, snowman and snowbird!  I know it's hard to tell but there's lots of Copic markers and stickles for sparkles!


Here are some of the holiday cards.  I've made a bunch of cards over the years and these are a few of the ones I still had left over in my stash.  Of course I had to throw in a Hanukkah card for my Jewish friends.


I don't know if any of you have played around with alcohol inks - the card standing up in the back has a large panel made with alcohol inks. I used glossy paper, an ink blending tool with a felt pad and a few drops of alcohol inks and some blending solution.  You then pounce it around on the glossy paper until you get a look you like. I love the look of it.  It looks great on glossy paper but you can use alcohol inks on other non-porous items like acetate or metal.


The last card is called an easel card.  It's really fun to make and I like the fact that it's easy for the recipient to stand up and view.  It folds nice and flat for mailing.


Hope you enjoyed looking at some of my favorite cards from holidays past.  Hope everyone has a safe and happy holiday season.  Hope to see you again soon!

Happy Chrisma-hanuk-kwanza-kah.....
Heidi

December 6, 2011

Boxes of Goodies

Hello friends!  It's December and Christmas is just around the corner.  I can't believe it's almost here.  Seems like just yesterday we were playing golf and having BBQ's in the backyard on a warm, sunny day!  Oh wait....that was me!  Oh how I miss the warm, sunny days - and winter hasn't even officially begun yet.  Yikes!

Since the holiday season is upon us....I want to show you guys what I made as little trinkets for my friends and co-workers.  As posted in an earlier entry, I have a part time job at Archiver's and I also have a full time job for a large insurance company in Milwaukee. WI.  I love to make cards and little treats for everyone throughout the year.  I have one friend at my day job who stopped by my desk on December 1st and asked where this year's treat was....I replied that it was only December 1st.  Wow, the pressure was definitely on....so I slaved all weekend....well, slaved may be kinda harsh - I did work hard to get these done...but they were lots of fun to make.  In fact, I got so quick at making them I could score, fold and glue one box during a TV commercial break.  Maybe I can petition to have box making an Olympic sport.  Good thing they went fast too, because I had to make around 36 of them.....phew!!!


The boxes were all made from cardstock from the Graphic 45 'Christmas Emporium' collection.  I absolutely LOVE these patterns. Some of the patterns were blacks and beiges which were great for the men on my list that may not have appreciated the girly patterns. I used almost the entire paper pack to make these boxes.  I stamped everyone's name using an alphabet stamp set from Lawn Fawn called 'Smitty's ABC'.  It's a nice, clean set of capital and lowercase letters. I have to laugh, I have such great friends who always come up with the best comments - another friend asked me how I managed to get everyone's name on the tags.  I told her they have this new item on the market called an alphabet stamp set.  LMBO!!!  I also used Candi from Craftworkcards in 'Vintage Berrie's and 'Holly Berries'.  The ribbon used was from my stash so I'm not sure of the vendor name.  The Martha Stewart scoring board is an absolute joy to use to make all the score lines and the oval punch is from Fiskars.

Lastly, of course I filled the boxes with all the candy I love so if there happened to be any leftovers, nothing would go to waste...LOL!  You can pretty much bet any leftover candy DOES NOT hang around too long!

I hope y'all enjoyed this week's post and thanks for visiting.

Heidi


November 29, 2011

Thanksgiving's Over, Next Holiday Please!!!

Hope everyone survived Thanksgiving!!!!  I had a pretty good holiday.  In September I moved my 81 year old mother in to live with me so this was our first Thanksgiving together in probably 19 years.  I made a small but tasty feast and I gotta tell ya, I've had about as much turkey as I can handle!  It was all good but I'm ready for a nice juicy burger right about now.

Well now that Thanksgiving is officially over, I can begin to enjoy all the Christmas fuss....now I don't mind seeing Christmas decorations or listening to Christmas music.  The decorations go up and the music seems to start earlier and earlier each year and by the time Christmas rolls around I just want to bang my head against a wall - so I tried to limit my exposure until at least after Thanksgiving.

Over the next several weeks I'll be posting some of the Christmas or Hanukkah cards I've made.  The first card is of a Hanukkah card I made which was published in the November 2010 issue of CardMaker Magazine.  There are so many different ways to spell Hanukkah (i.e. Chanukah, Chanukkah and Chanuka).  The stamp set I used spelled it differently than I do but the sentiment is still the same.  LOL!!!!


This card was the first card I submitted that was accepted for publication.  I think I sent a total of eight cards for that particular submission request and was thrilled when they selected one.  I received the 'we'd love to publish' email for this one right before I got the remaining 'unable to use' emails....at least the good news was received first.  So far I've had four cards accepted for publication.  All in CardMaker Magazine....no wonder they're my FAV magazine!!!


This type of card is called a waterfall card.  When you pull the tail with the ribbon on it, the four little tiles flip like a waterfall.  


Since I made this card a year ago I don't have an accurate list of the supplies used.  I do know the stamp set is called Jewish Greetings and it's from Impression Obsession. 

That about it does it for this post...I hope you enjoyed seeing this. 

Heidi


November 19, 2011

Celebrating Fall


Hello everyone....

I know, I know, we're way into the Fall season but I wanted to share this card I made to welcome in Fall this year.  I knew when I saw the patterned paper it would make a beautiful card.  Fall is my favorite season...I just love the color combinations - reds, oranges and yellows.  The colors just don't last long enough for me - the leaves go from all those wonderful colors to plain, naked branches! 


I'm showing three cards because I wanted to show the patterned paper in each one is different.  It's all the same piece of paper just a different portion of the sheet. The patterened paper is from Bo Bunny's Forever Fall collection and is called 'Forever Fall Blaze'.  The leaf border is from an edger punch from EK Success called 'Leaf Chain'.  I know it's hard to tell from the picture but the brown cardstock behind the stamped sentiment is a dark chocolate glitter paper from The Best Creation Inc. This is the best glitter cardstock because the glitter is in the paper itself, it does NOT come off when you touch it so there's no glitter on the table, the floor or on your face...LOL!  I used the X-tra large modern label and the word window punches from Stampin' Up to punch out the sentiment which is from Stampendous 'Everything Happy' set.   Craftwork Cards has this new product out called 'Candi' which are little round pieces that resemble brads without the bulky prongs.  I just used glue dots to attach them to the card and they look really great!  They come in tons of different colors and I used the 'Sahara' pack.

I hope everyone has a happy Thanksgiving and is able to spend time enjoying family, friends and food!!!! 

Heidi

November 13, 2011

Oh My Gosh - It's My First BLOG!

Hello, my name is Heidi and welcome to my first ever blog post.  Oh, I've read lots of blogs but this is my first attempt at actual blogging.

I have this really fun, part time job at Archiver's where everyone there is sooooo talented and I'm always learning new things. Since I love, love, love to learn different techniques and my Mother raised me to ALWAYS share with others, I thought what better way to share what I learn then to post it in a blog? While everything I share may not always incorporate a new technique, it will always incorporate my love of card making! 

But first, you may wonder how I picked the name 'Smiley Guy Designs'? Well, besides the obvious fact that I'm basically a happy person and love a cute Smiley Face, I have this little stuffed character that my boyfriend gave me about 12-13 years ago.  He's a Smiley Face with little legs so I named him 'Smiley Guy'.  Now, Smiley Guy made the rounds and never stayed where I put him.  Somedays I would open the dryer and he'd be in there with the laundry.  Sometimes he would be inside the bag of dog food just sitting there staring at me.  One day I even found him in the fridge.  So when I think of things that make me happy....making cards is one thing but remembering how Smiley Guy makes me....well, smile...I  just thought it would be an appropriate name for my blog.


So to get things started I'd like to share with you one of my recent Thanksgiving cards.

I used papers from We R Memory Keepers ‘Autumn Splendor’ collection to which I inked all edges to give them a little bit of depth.  I love the muted fall colors.  I stamped the two-part tree image using a stamp-a-ma-jig tool that helps you align your stamp perfectly.  I stamped the tree trunk in brown and then was able to perfectly stamp the leaves around the trunk in green.  It’s such a cool tool!  The stamps are part of the ‘Trendy Trees’ stamp set from Stampin’ Up.  The sentiment is from the ‘Vintage Picnic Sentiments' set from Papertrey Ink.  The border punch at the bottom is from EK Success and is called ‘Plaid’.  I layered a brown ribbon on top of a yellowish gold ribbon, adhered everything down and voila – a card is born! Oh, and of course you need a coordinating envelope to match!

Phew!  Seems I've made it through my first post - I hope y'all enjoyed it!  Thanks for reading!

Heidi